Tuesday, January 31, 2017

Tapioca Pearl Sensory Play!

We didn't get to do a Messy Monday this week because we were visiting my grandmother in the hospital. (Please keep her in your prayers.)

So we did our messy activity today! Check out the fun we had with Tapioca pearls!


Tapioca pearls are a lot like water beads - but baby and toddler safe! I bought the largest size my grocery store had, but you can order the ones used in boba tea online and those are closer to the size of real water beads. I have been wanting to do this for a few weeks now, but it does require a bit of planning ahead and I never seemed to remember. 

Example of the size.
This is the brand/size I used.


All you need to do is soak the pearls overnight (follow the instructions on the bag - I have seen on some blogs they had to cook the pearls, but my bag said to soak the pearls overnight and then gave the recipe for tapioca pudding, so I just soaked them.) To get the color, I added a few drops of food coloring to the water while they soaked. Since Valentines day is coming up. I used pink, red, and red+blue for purple for some seasonal colors! Right before we were ready to play, I rinsed them thoroughly, to remove the excess coloring. It didn't really stain our hands, we will see about the clothes.

This was a HUGE hit with Beatrix!


The first touch is always a little scary - something totally new! The pearls are a little slimy and a little squishy. She warmed up to them very quickly! She needed some purpose to the activity, so I gave her a toy pan to transfer them to. (It was right behind me.)


Bea kept giving me handfulls, so I got in on the fun as well!


Here is where it started to get messy...


I added some water to make things a little more interesting. They move quite nicely in the water as it keeps them from sticking together.


Beatrix thought it would be fun to dump them out.
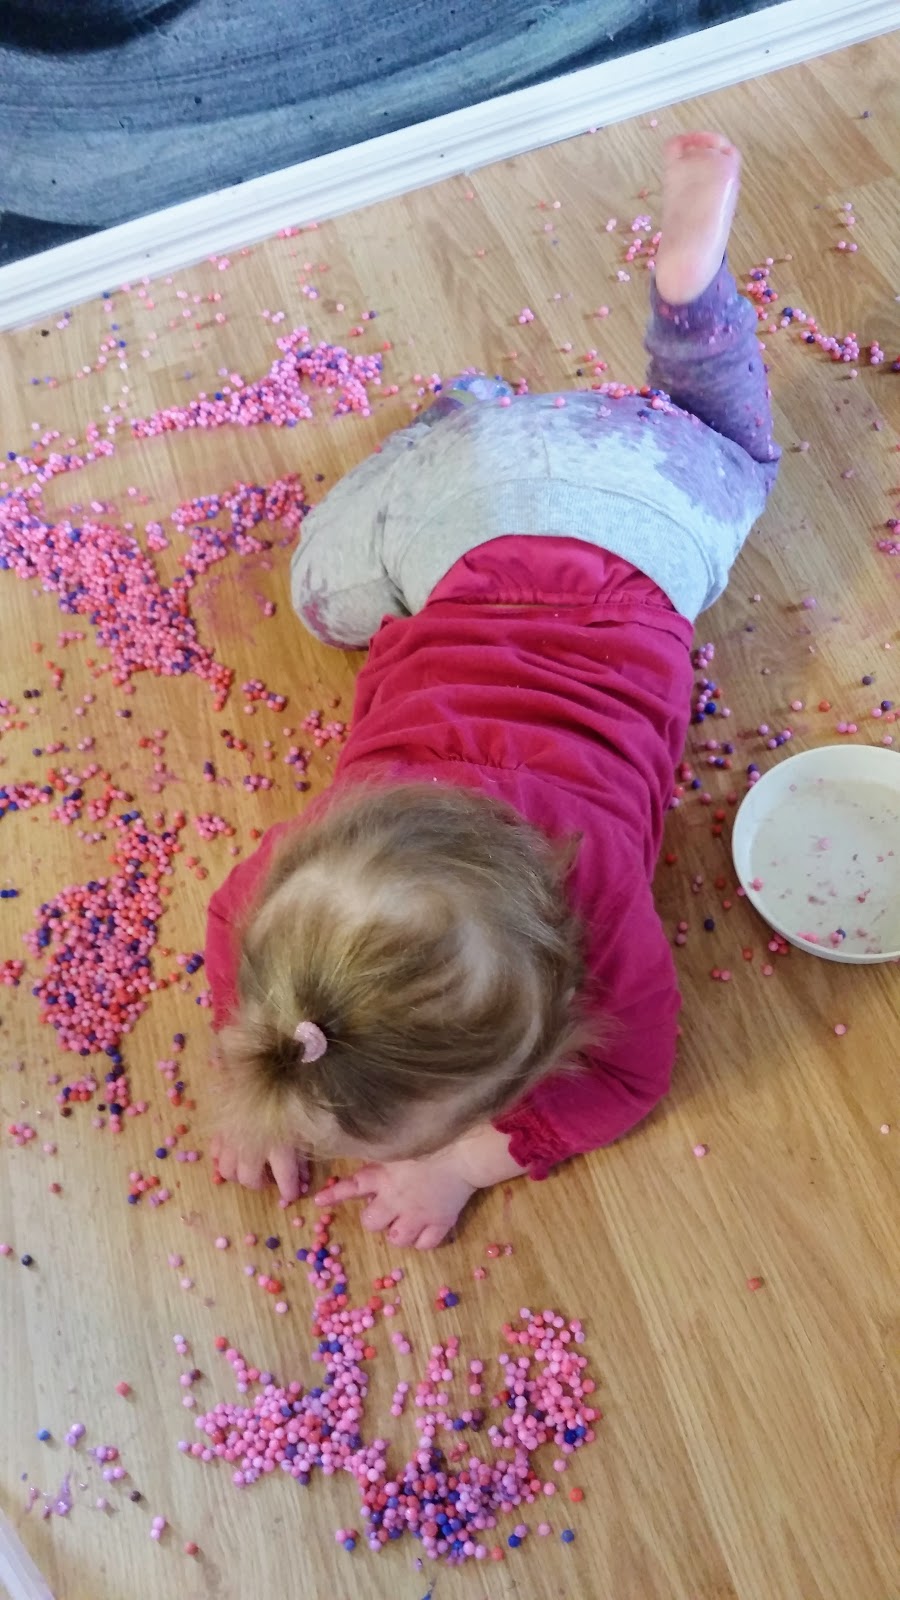

She lay down on her tummy and was kicking her feet while rolling them on the floor.


Making a tapioca angel?


These are taste safe, but unless you give them some flavor your kiddo will likely make the face Bea is making above. This is not meant for a snack.


We had quite a good time with the plastic tub as well!


Beatrix helped me wash up afterwards. She is getting so big! She loves to help out with chores.

Tapioca pearls are a great alternative to water beads if your child still likes to explore with their mouth. They were fun "dry" and with a little water. Next time I think I will add a lot of water and do an ocean themed sensory tub with them!

Monday, January 23, 2017

Messy Monday: Seashell Washing

Hello! We are getting back in the swing of things after the holidays (still) and I finally got together our first "Messy Monday" activity of the year: Seashell Washing!


If you are a little leery of messy play, this is the activity for you! I love water for "messy" play, because it is cheap, easy, and doesn't usually require a lot of prep work.

Growing up, we always had a "Beach Day" sometime in January. We would turn up the heat, wear our swim suits and do our schoolwork on pool floaties in the living room while listening to the Beach Boys and eating popsicles. That was my inspiration for our activity!

I placed some shells in the bottom of a shallow tub (any bowl or bucket would work fine) and added water. I used warm water, since it is winter and a bit chilly. I set out our trusty kiddie pool with some towels around it, just in case of splashes. I set the tub with the water and shells in the pool with a couple of washcloths and waited for Beatrix to take interest. She was very curious and crawled right over. (Note: it is important to me to create activities for her and "invite" her to participate, not force her to.) I stripped her down to just her t-shirt and plopped her in.


I grabbed a washcloth and started "washing" some shells to give her an idea of what to do and encouraged her to try it as well. She did for a little bit, then moved on to her ideas of how to play with this scenario.


She enjoyed watching water drip off of the washcloth and drip on to her leg.


She loved stirring the shells up and making the water splash out!


She looks soo tired in this picture. She was fighting naps and bedtime yesterday and I don't think she slept very well. Thankfully she wasn't grumpy, just really mellow. After lunch she kept laying on the floor and cuddling Cupcake.


She played with this for about 45 minutes and she appeared to be having a grand time!

This activity could really be done with any water-safe item: rocks, toy animal figurines, even fruits and veggies! I also think it would be fun to use soap to make bubbles - toy dishes washing perhaps? It would be great to do outside in the summer for some cooling-off play. 

Now if only I could get her to wash the dirty dishes in my sink... ;) 

Tuesday, January 10, 2017

Yellow Treasure Basket

I took a month off from posting for the holidays - it was just so busy! Now that things have gotten back to our normal level of crazy around here, I should be posting more often again! 

Beatrix has been pointing out yellow things a lot lately and if I ask her to "choose the yellow one" she typically gets it right! So, to reinforce the concept of "yellow" I decided to make a yellow treasure basket, full of all sorts of different shades and textures! Plus - who doesn't need more sunshine and cheeriness in their life in January? 


Whats inside:
A piece of felt (23 cents at Walmart)
A feather
A rubber ducky
A Lego Duplo
A pipe cleaner
A paint chip
A ball
A Hotwheels car
A mirror
Some tissue paper
A (new) pair of rubber gloves
A small stuffed duck
Two mini emoji pillows

Get creative and search your house - you never know what you will find! Just make sure all items are safe for your child and try to provide a variety of sizes/weights/textures!


Beatrix is checking her basket out. I didn't get pictures, but earlier today she was putting on the rubber gloves and waving! I included the tissue paper knowing she would crumple and rip it, and that is okay! She made one tiny rip and looked at me to see if I would scold her. When I told her it was okay for her to rip she just tossed it aside! That ornery little girl! 


Elsa thought she had better make sure everything was safe for Bea.

Color themed baskets can be so quick to throw together - show me what you come up with!

Saturday, December 10, 2016

DIY No-Sew Carseat Poncho (and One for Your Build-A-Bear Too!)


I advocate for a lot of things: breastfeeding, babywearing, cloth diapering, and carseat safety! If you choose not to do the first three, that is your choice and I do not judge you for that. But if you choose to be flippant about carseat safety, that makes me upset. One big rule with carseats is no coats! Last winter we had one of those Cozy Covers on her infant seat and just zipped that over the top. This year it is not so easy. I am not a fan of fussing with the coat on and off in the car. (In fact, many times I don't wear a coat, because I don't like to fuss with it.) This idea seemed so genius to me! A lady in my mom group was making these for some other members and so I decided to make my own version!

  
The first step was choosing the fabric. Beatrix quickly fell in love with this print. She really loves puppies! We went with a solid gray for the back (you could just do one layer if you live somewhere not quite as chilly.) I got 1 yard of each. Since we did two layers this is reversible! Then I measured from her shoulder down to about halfway between her knee and her foot. I doubled that length for my measurement of where to cut. So hers is 1 yard wide by however tall x 2 (I could not find my measuring tape so I just used a string). Mr. Fish suggested we make Cupcake a matching poncho with the extra. Cupcake is the puppy she made at Build-A-Bear on her birthday and she is quite attached. The pictures I took of the process are with Cupcake's poncho, but it all works the same way.

Disclaimer: I tend to just wing things and I did not follow a pattern, nor do I have exact measurements. That is just the way I do things. This was really easy and no-sew fleece projects are very forgiving. You could also hem this instead of tying the edges if you like. I just didn't feel like dragging out my sewing machine. I just put it away last week after finishing up Christmas presents.

Set both of your fabrics on top of each other and cut to the desired size. You could make the end shape a circle or a diamond if you like - make those cuts now. We went with a rectangle for simplicity sake. Next you want to cut the neck hole. Fold the fabric in half the hamburger bun way, then the hot dog bun way. Mark the center and then make a small cut down into the fabric and then across the fold on each side. It should look like the picture below on the right. I just guesstimated the neck hole size, but you could measure the neck of a shirt that fits.


Next, cut each of the triangles that make up the neck hole in half and in half again like you see below.


(Can I just add how I hate cutting fabric with animals or people on it? It is so freaky cutting through their heads and limbs!!!)

Next tie each of those little triangles with the corresponding triangle in the layer below. You could trim the ends if you like. Here it is with the neck hole tied and the fringe cut.


Below on the left is Cupcake's poncho all finished! Cupcake is modeling the print and the gray below in the middle and right pictures, respectively. (She holds more still than Beatrix.)


Above is Bea's finished poncho, folded, like it would be if it were on her. Below it is all laid out.


We also had enough fabric to make a small blanket for Cupcake or her dollies. Below are the two matching cuties! She was not too thrilled that she could not see her arms, but she got used to it quickly.


Here it is in action! The idea is to flip the back up over the back of the carseat, lift the front and buckle underneath that. Keeping your little one warm and cozy AND safe too!


Monday, December 5, 2016

Messy Monday: Peppermint Oats


Happy Monday everyone! We had a grand time this morning with this activity and you can too!

Ingredients:

Oats
Peppermint extract
Red and green food coloring

I put oats in two separate zippy bags, added a splash of peppermint extract and a few drops of food coloring. shake and knead the bag to really get the food coloring worked in. (I did this last night so the coloring could soak in better and we did not have any stains.) The peppermint scent was quite mild. You could leave it out if you wanted, it would still be a really fun activity.

I put them in a Christmas tin, but you could really use any container you like. I thought Bea would enjoy mixing the colors so I carefully filled the container keeping the red and green oats separate. They looked really pretty once combined as well!


We had Christmas music blaring as we played, so Beatrix was dancing and having a really jolly time. We worked on scooping and dumping skills by filling the muffin tin. We also stirred them around and buried our hands in them! And for easy cleanup the spilled oats will just be vacuumed right up.


These could be used over and over, so I am storing them in the tin. Older kids may enjoy making a batch of these and sprinkling them outside for "reindeer food" on Christmas Eve!