Showing posts with label Messy. Show all posts

Thursday, April 27, 2017

Flowering Tree Q-tip Bundle Paint Stamping

Wow, life has been crazy since I last posted. Hopefully I will get back in the swing of things in these next few weeks!

Today Beatrix and I did a painting project!


Isn't it cute? She really did a great job!


I drew a quick tree with a brown crayon (you could cut one out of brown construction paper for added dimension, that would be really cute!)


To make the stamp, take a small handful of q-tips and tape them in a little bundle. I chose pink, green, and white paint. I was going to mix the white with the pink and the green to make them lighter, but I forgot to leave out a q-tip for mixing and Beatrix was getting antsy to start. It got all mixed up anyway!


We started with the tree upside down so she would be more likely to paint the branches. She really got into filling all the white spaces with paint!


So proud of her work! I did direct her just a little bit, I suggested she use green at the bottom like grass and rotated the paper to help her find empty spaces to paint so she didn't have to drag her arms through the fresh paint. But ultimately she was the artist!


The finished product! This would be a great Mother's Day gift for grandma's or an easy project for dad to do with the kids for their mom! I also think it would be fun to do one for each season as they come. This would make a really pretty fall tree with oranges and yellows, don't you think?

I hope I will get back in the habit of posting more often - I have a few fun Spring ideas up my sleeve!

Monday, March 20, 2017

Cooking with a Toddler


Cooking with a toddler is crazy, messy, practical fun. The skills they learn and the memories they make while cooking will be something they carry with them their whole lives. 

Beatrix has been in the kitchen with me since a few days old. I would either wear her or she would sit in her bouncy chair while I cooked and explained to her everything I was doing. I still wear her a lot of the time while I cook, but more and more I am having her help me out! 


Above are pictures of some of Bea's previous cooking adventures.

Here are some things to keep in mind while cooking with a toddler:

  1. Plan ahead. Gather all of your ingredients, you may also want to pre-measure everything into bowls like they do on cooking shows. You don't want to leave your child sitting on the counter where they may fall while you rummage in the pantry for a new bag of sugar. 
  2. Let them try. Cooking is a perfect opportunity to help them hone their scooping, dumping, and stirring skills.
  3. It is okay to make a mess. ^see above^ Your child's skills likely need some perfecting. Just accept the fact there will be a mess. Obviously you don't want flour thrown all over your kitchen, but if they are really trying to make it in the bowl, encourage them! Make sure they participate in cleaning the mess afterward!
  4. Be ready for lots of touching. All these ingredients are interesting! Some are cold, some are sticky. Let them explore with their senses. If it is safe, allow them to taste. They should wash their hands before cooking, to avoid germs.
  5. Keep them safe. This really should go without saying, but never let a toddler handle hot food or sharp utensils.


Today, Bea and I baked chocolate chip cookies. She helped stir the dry ingredients together, after she dumped in the flour I measured for her. In the middle picture she is tasting the butter. In the picture on the right she is sneaking some dough.


She helped me by putting handfuls of chocolate chips in the mixing bowl.


She may have eaten a few!


The look on her face says it all :) she is so proud of the cookies she helped to make!

Don't be afraid to let your toddler help you cook! The memories you will make are priceless.


Monday, February 20, 2017

Messy Monday: Paintbrush Experiment


Beatrix was so interested in the paint last week that I decided we should play with paint again, this time trying out some different materials for applying the paint to the paper.

I bent a pipe cleaner into a triangle stamp, pinched a pom with a clothespin, grabbed a feather, a Q-tip, and a foam brush, and some paper. I like using cardstock, because it holds up under the paint better.

I poured some finger paint on to a paper plate for our palette. (pro-tip: use just a few colors that will look okay mixed together to avoid the muddy color look.) I got a damp cloth ready for cleaning up at the end and I zipped Bea into her jammies-turned-paint-smock.


Beatrix really seemed to enjoy using the pom the best, and she also liked the triangle stamp. I painted along with Bea and found the feather was really interesting to paint with. 

You don't need fancy supplies to explore art, just see what is hiding around your house and at the bottom of your craft/junk drawer. Older children may enjoy doing the gathering of items themselves. For the younger ones, keep it to just a few options and offer them one at a time, as to not overwhelm them. Remember, this type of art is more about the process than the end result. I keep all of these paintings of Bea's for future use as gifts/cards.

What other household items would be fun to paint with? 

Monday, February 13, 2017

Last-minute Toddler Valentine Crafts!

In this post I will go over two quick and easy Valentine's Day crafts that are fun for toddlers. One is messy and one is not!

First up is a heart-shaped sun catcher.


Supplies needed:
  • Contact paper
  • Tissue paper
  • Washi tape (optional)

I drew a heart on contact paper and cut some tissue paper into little squares.


Peel off the paper backing and you are good to go. Show your child how the tissue sticks to the contact paper and let them have at it!


Beatrix was not too sure about the sticky paper. But she came around and had quite a good time making this craft. We also explored the laws of gravity by watching squares of tissue paper float to the ground.


To finish it off, I lay it down on another sheet of contact paper and trimmed the excess. I wrapped washi tape to finish the edges, but that is totally optional.

Of course it wasn't too sunny of a day, but it sure looks beautiful in the window. ;)

Next up: DIY Toilet Paper Roll Heart Stamp


Supplies Needed:
  • Empty toilet paper roll
  • Tape
  • Paint
  • Paper
You will also need something to squeeze the paint on (I use a paper plate) and you may want some kind of paint smock for your child and a protective covering for your work space. Have a damp washcloth ready for easy clean up!


Here is the stamp. Basically, flatten a toilet paper tube and crease the folds. Then tuck one point inside and sort of squeeze it to make a heart shape. I used tape to keep it in the correct shape.


It doesn't have to be perfect!


I use a pair of garage-sale footie PJ's as a coverall paint smock. Just zip it right over her clothes!


I wasn't sure if Beatrix would grasp the concept of the stamp, but she actually did really well!


Of course, we painted with our hands too.


 Here is the finished product! We actually painted 3 sheets of paper before she got tired of this activity!

So there you have it! Two toddler Valentine's Day crafts that you can pull off at the last minute!


Monday, February 6, 2017

Messy Monday: Valentine's Day Sensory Rice


Why did I wait so long to try dying rice for sensory play? This was seriously one of the easiest activities I have put together. As a bonus, unless the rice gets wet or really dirty, it can be used over and over again!


All it took was some rice - I used extra long grain white rice. I bought way more than I needed for some DIY handwarmers we gave as gifts at Christmas this year, so this is just what I had on hand. You could really use whatever rice you like. I probably dyed 3 cups of rice red and 2 cups blue. I wanted a nice layer in my glass baking dish.

Just scoop the desired amount into a gallon zippy bag, add a small amount of food coloring and a splash of water, and mix up by squeezing/shaking the bag. (It took about 20 seconds to incorporate the coloring throughout the rice. I used gel food coloring and it really didn't take much at all. I used way too much with both the red and the blue.) Then I spread it out on a sheet tray to dry overnight.


This morning I carefully scooped it into the baking dish, making a heart shape in the middle!


I laid a tablecloth out on the floor for easy clean-up and gathered a few scooping/transferring/pouring utensils for us to use!


My little one-socked girl went right for the spoons!


Feeling the rice with her hands.


Bea discovered the rice falling into the glass measuring cup made a really pretty sound. She watched the rice fall out of her hand and listened to it hitting the cup for quite some time.


Really getting into it now :)


Quite proud of the mess she made!


It looks quite lovely mixed together. I love bright blue with red or pink! It is also worth noting that this will not stain hands or clothing, provided the rice is dry!

I gathered up all the rice, using the tablecloth to pour all the spilt rice into the baking dish. I put all the rice in a zippy bag and stowed it in the back of my refrigerator to be played with another day. :)

Tuesday, January 31, 2017

Tapioca Pearl Sensory Play!

We didn't get to do a Messy Monday this week because we were visiting my grandmother in the hospital. (Please keep her in your prayers.)

So we did our messy activity today! Check out the fun we had with Tapioca pearls!


Tapioca pearls are a lot like water beads - but baby and toddler safe! I bought the largest size my grocery store had, but you can order the ones used in boba tea online and those are closer to the size of real water beads. I have been wanting to do this for a few weeks now, but it does require a bit of planning ahead and I never seemed to remember. 

Example of the size.
This is the brand/size I used.


All you need to do is soak the pearls overnight (follow the instructions on the bag - I have seen on some blogs they had to cook the pearls, but my bag said to soak the pearls overnight and then gave the recipe for tapioca pudding, so I just soaked them.) To get the color, I added a few drops of food coloring to the water while they soaked. Since Valentines day is coming up. I used pink, red, and red+blue for purple for some seasonal colors! Right before we were ready to play, I rinsed them thoroughly, to remove the excess coloring. It didn't really stain our hands, we will see about the clothes.

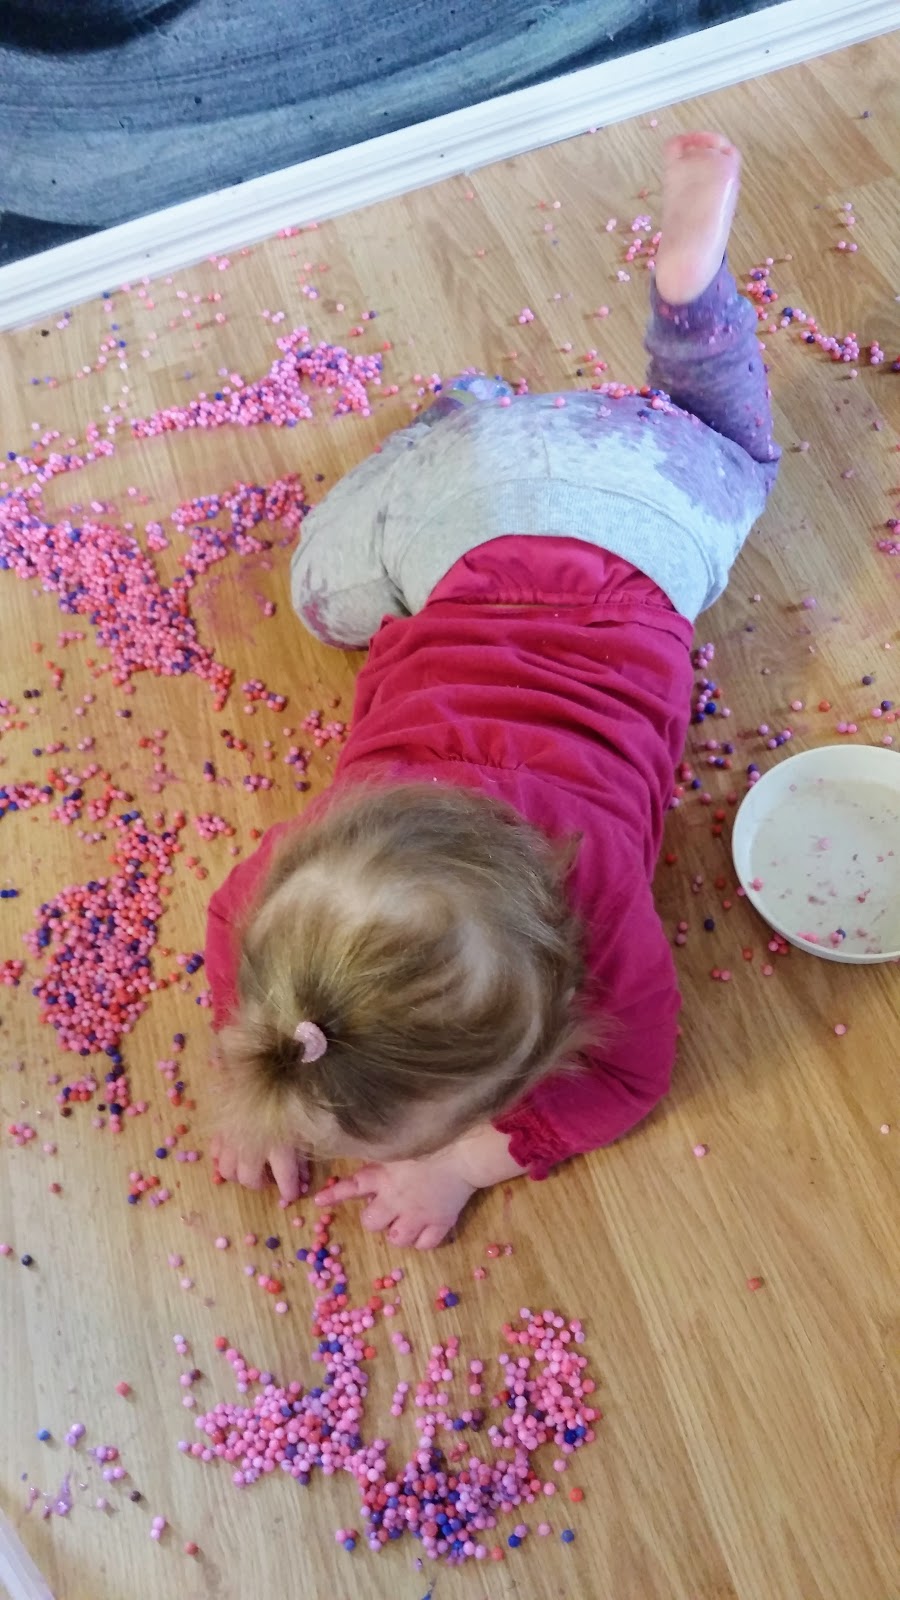
This was a HUGE hit with Beatrix!


The first touch is always a little scary - something totally new! The pearls are a little slimy and a little squishy. She warmed up to them very quickly! She needed some purpose to the activity, so I gave her a toy pan to transfer them to. (It was right behind me.)


Bea kept giving me handfulls, so I got in on the fun as well!


Here is where it started to get messy...


I added some water to make things a little more interesting. They move quite nicely in the water as it keeps them from sticking together.


Beatrix thought it would be fun to dump them out.


She lay down on her tummy and was kicking her feet while rolling them on the floor.


Making a tapioca angel?


These are taste safe, but unless you give them some flavor your kiddo will likely make the face Bea is making above. This is not meant for a snack.


We had quite a good time with the plastic tub as well!


Beatrix helped me wash up afterwards. She is getting so big! She loves to help out with chores.

Tapioca pearls are a great alternative to water beads if your child still likes to explore with their mouth. They were fun "dry" and with a little water. Next time I think I will add a lot of water and do an ocean themed sensory tub with them!