Showing posts with label paint. Show all posts

Tuesday, November 7, 2017

Indian Corn Toddler Craft


Any craft involving paint is always a hit with Beatrix, so this was a great Thanksgiving project for us!


We used Lego Duplos to stamp lots of little circles with red, orange, yellow, and brown paint on some white paper. 


Then we went on a walk to look for some cornstalk leaves to use as the corn husks in our project.


Once the paint was dry I cut out a corn shape from the painting. I trimmed some corn leaves and taped them down first. (You could also cut leaf shapes out of brown paper bags and crinkle them up a bit for some texture.) Then we taped the corn down on top. And there you have it! So cute to hang up and display for Thanksgiving!


Monday, October 23, 2017

Easy Pumpkin Craft for Toddlers and Preschoolers


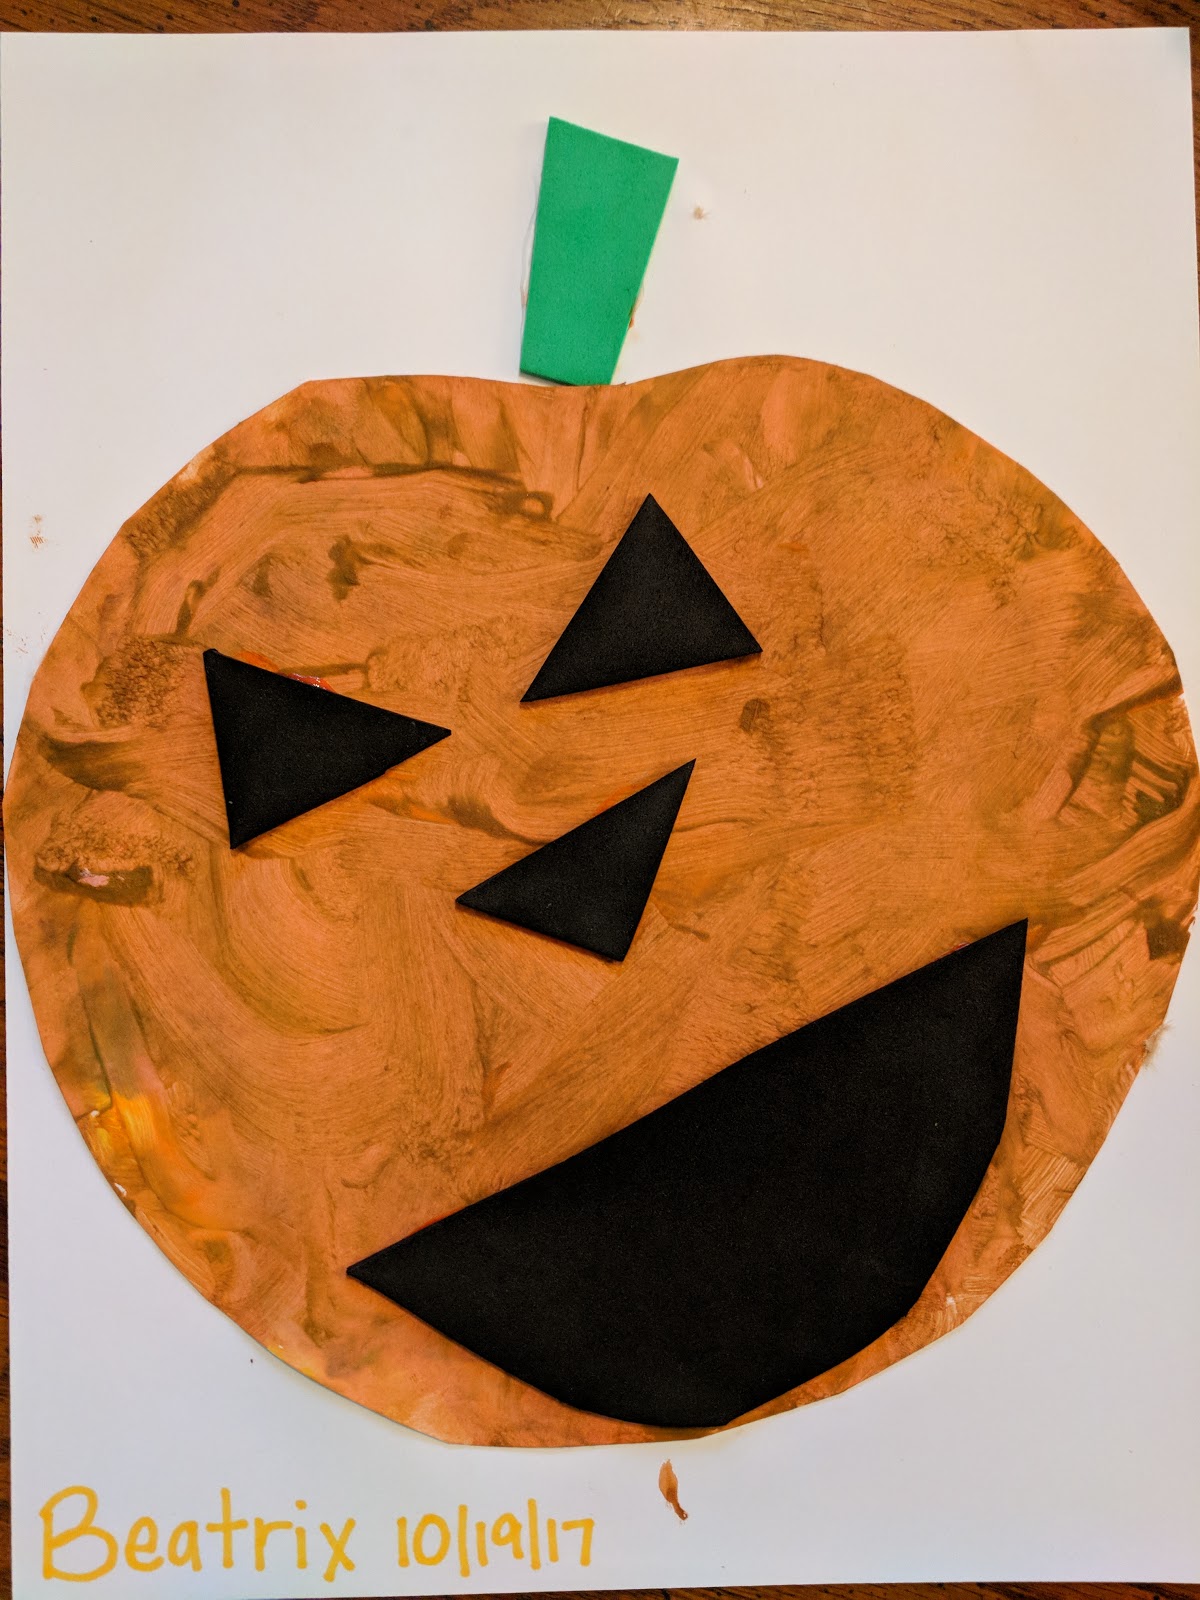
Last week Beatrix and I needed something to do. She had been asking to paint for a few days now, so I wanted to do something with paint. A little quick thinking and this is what I came up with. We both had a blast making this adorable little Jack-O-Lantern!

I cut a piece of paper into a rough pumpkin shape for her to paint. She used yellow and brown in addition to orange (she wanted more than one color.) *tip - a brown paper grocery sack makes an excellent paint mat!*


I told her to fill the whole paper with paint, leaving no white spots. She took this instruction very seriously! She got every last white space using both a brush and her hands. While she painted I cut shapes for his face and a stem out of craft foam. Construction paper would also work well. (An older child would enjoy doing this step for themselves.)


We let the pumpkin dry while we ate lunch, then it was time to give him a face! We talked about where our eyes, nose and mouth are located on our face, to give her an idea of where to put each shape. I had her arrange the face and then I glued each piece on in her chosen location with white glue. I also glued the whole pumpkin to another sheet of paper. I set the whole thing under a heavy book to dry. She was so proud to see it hanging on the wall when she woke up from her nap! 


Thursday, April 27, 2017

Flowering Tree Q-tip Bundle Paint Stamping

Wow, life has been crazy since I last posted. Hopefully I will get back in the swing of things in these next few weeks!

Today Beatrix and I did a painting project!


Isn't it cute? She really did a great job!


I drew a quick tree with a brown crayon (you could cut one out of brown construction paper for added dimension, that would be really cute!)


To make the stamp, take a small handful of q-tips and tape them in a little bundle. I chose pink, green, and white paint. I was going to mix the white with the pink and the green to make them lighter, but I forgot to leave out a q-tip for mixing and Beatrix was getting antsy to start. It got all mixed up anyway!


We started with the tree upside down so she would be more likely to paint the branches. She really got into filling all the white spaces with paint!


So proud of her work! I did direct her just a little bit, I suggested she use green at the bottom like grass and rotated the paper to help her find empty spaces to paint so she didn't have to drag her arms through the fresh paint. But ultimately she was the artist!


The finished product! This would be a great Mother's Day gift for grandma's or an easy project for dad to do with the kids for their mom! I also think it would be fun to do one for each season as they come. This would make a really pretty fall tree with oranges and yellows, don't you think?

I hope I will get back in the habit of posting more often - I have a few fun Spring ideas up my sleeve!

Monday, February 13, 2017

Last-minute Toddler Valentine Crafts!

In this post I will go over two quick and easy Valentine's Day crafts that are fun for toddlers. One is messy and one is not!

First up is a heart-shaped sun catcher.


Supplies needed:
  • Contact paper
  • Tissue paper
  • Washi tape (optional)

I drew a heart on contact paper and cut some tissue paper into little squares.


Peel off the paper backing and you are good to go. Show your child how the tissue sticks to the contact paper and let them have at it!


Beatrix was not too sure about the sticky paper. But she came around and had quite a good time making this craft. We also explored the laws of gravity by watching squares of tissue paper float to the ground.


To finish it off, I lay it down on another sheet of contact paper and trimmed the excess. I wrapped washi tape to finish the edges, but that is totally optional.

Of course it wasn't too sunny of a day, but it sure looks beautiful in the window. ;)

Next up: DIY Toilet Paper Roll Heart Stamp


Supplies Needed:
  • Empty toilet paper roll
  • Tape
  • Paint
  • Paper
You will also need something to squeeze the paint on (I use a paper plate) and you may want some kind of paint smock for your child and a protective covering for your work space. Have a damp washcloth ready for easy clean up!


Here is the stamp. Basically, flatten a toilet paper tube and crease the folds. Then tuck one point inside and sort of squeeze it to make a heart shape. I used tape to keep it in the correct shape.


It doesn't have to be perfect!


I use a pair of garage-sale footie PJ's as a coverall paint smock. Just zip it right over her clothes!


I wasn't sure if Beatrix would grasp the concept of the stamp, but she actually did really well!


Of course, we painted with our hands too.


 Here is the finished product! We actually painted 3 sheets of paper before she got tired of this activity!

So there you have it! Two toddler Valentine's Day crafts that you can pull off at the last minute!


Monday, November 28, 2016

Messy Monday: Homemade Finger Paint Artwork!


I have been wanting to try finger paints where I could actually keep the artwork Beatrix made. She is still exploring the world with her mouth, so I am not super comfortable with letting her use commercial paints. I found THIS RECIPE for non-toxic finger paint, so I decided to give it a go! Knowing exactly what was in it, and that everything was edible, made me feel a lot better about her getting her hands into it!

For the paint:

3 TBSP sugar
1/2 TSP salt
1/2 C cornstarch
2 C water
Food coloring

Combine all ingredients except food coloring in a small saucepan and warm on low heat while stirring until mixture begins to thicken. Pour into containers (one for each desired color) and add food coloring. Make sure the paint is not too hot before you start painting!

The first batch I made, I let it thicken too long and when I went to use it this morning, it was firm - almost like a rubbery play-dough. Thankfully it doesn't take long at all to stir up a batch, I just put Beatrix up on my back in the Tula and she watched!

You could do this on paper, but we did it on a canvas I had prepared, because I want to give it as a Christmas gift to someone. For the canvas, I painted it yellow, then when that was dry, I drew the design with pencil freehand and filled it in with tape. I would have used painters tape, but I didn't have any, so I used some washi tape. The color bled through slightly though, because it got wet, so just a warning there. I cut it in small pieces and really made sure there were no bubbles where paint could seep under. I pulled the tape off while the finger paint was still wet.

We used the paint basically right away, while it was still a little warm, since she already had her footie-pj's-turned-paint-smock on on top of her clothes and was itching to go.


First she just wanted to paint with the fork that I had stirred the paint with, but she switched to brushes, then her hands.


Then she painted her hands and my hand! It was most definitely a Messy Monday!


She accidentally spilled 2 of the pots of paint, thankfully it was thick enough that it didn't soak through the towel. I am not going to post the finished project, as it is a Christmas gift, but it turned out really cute! It did stain our hands, but I haven't tried that hard to wash it off yet. Based off past experiences, food coloring washes out after a bath pretty well. You could also use liquid watercolors, which are washable, just not quite as taste safe. She did try to put it in her mouth a couple of times, so I am glad we used a non-toxic recipe!


Monday, November 14, 2016

Messy Monday: Cupcake Pudding Paint!

It is hard to believe, but little Bea turns one this Friday! For her Birthday week Messy Monday activity (and since we skipped last week as Mr. Fish was on vacation) I thought we would make a big birthday mess!

 I made some vanilla instant pudding and poured it into a muffin tin. I added some food coloring to make each cup a different color. Right before play time I added some sprinkles for some extra birthday fun! I set a white cutting board on a sheet tray for her to paint and I supplied her with a silicone basting brush.


The colors were so vibrant! We have done baby cereal paint in the past, but I like the smooth texture of the pudding paint!


She was rather hesitant at first, as she tends to be with cold things and new textures.


She came and sat on my lap for awhile and watched me smear the paint around and I finally got her to taste some!


After that she was a happy little artist!


Oh my, what a mess!


I put some soap in a big bowl and ran some warm water in it, We did a very splashy sponge bath and then she helped me wash the floor. This was a great start to her last few "baby" days!

Friday, October 14, 2016

DIY Non-skid Socks

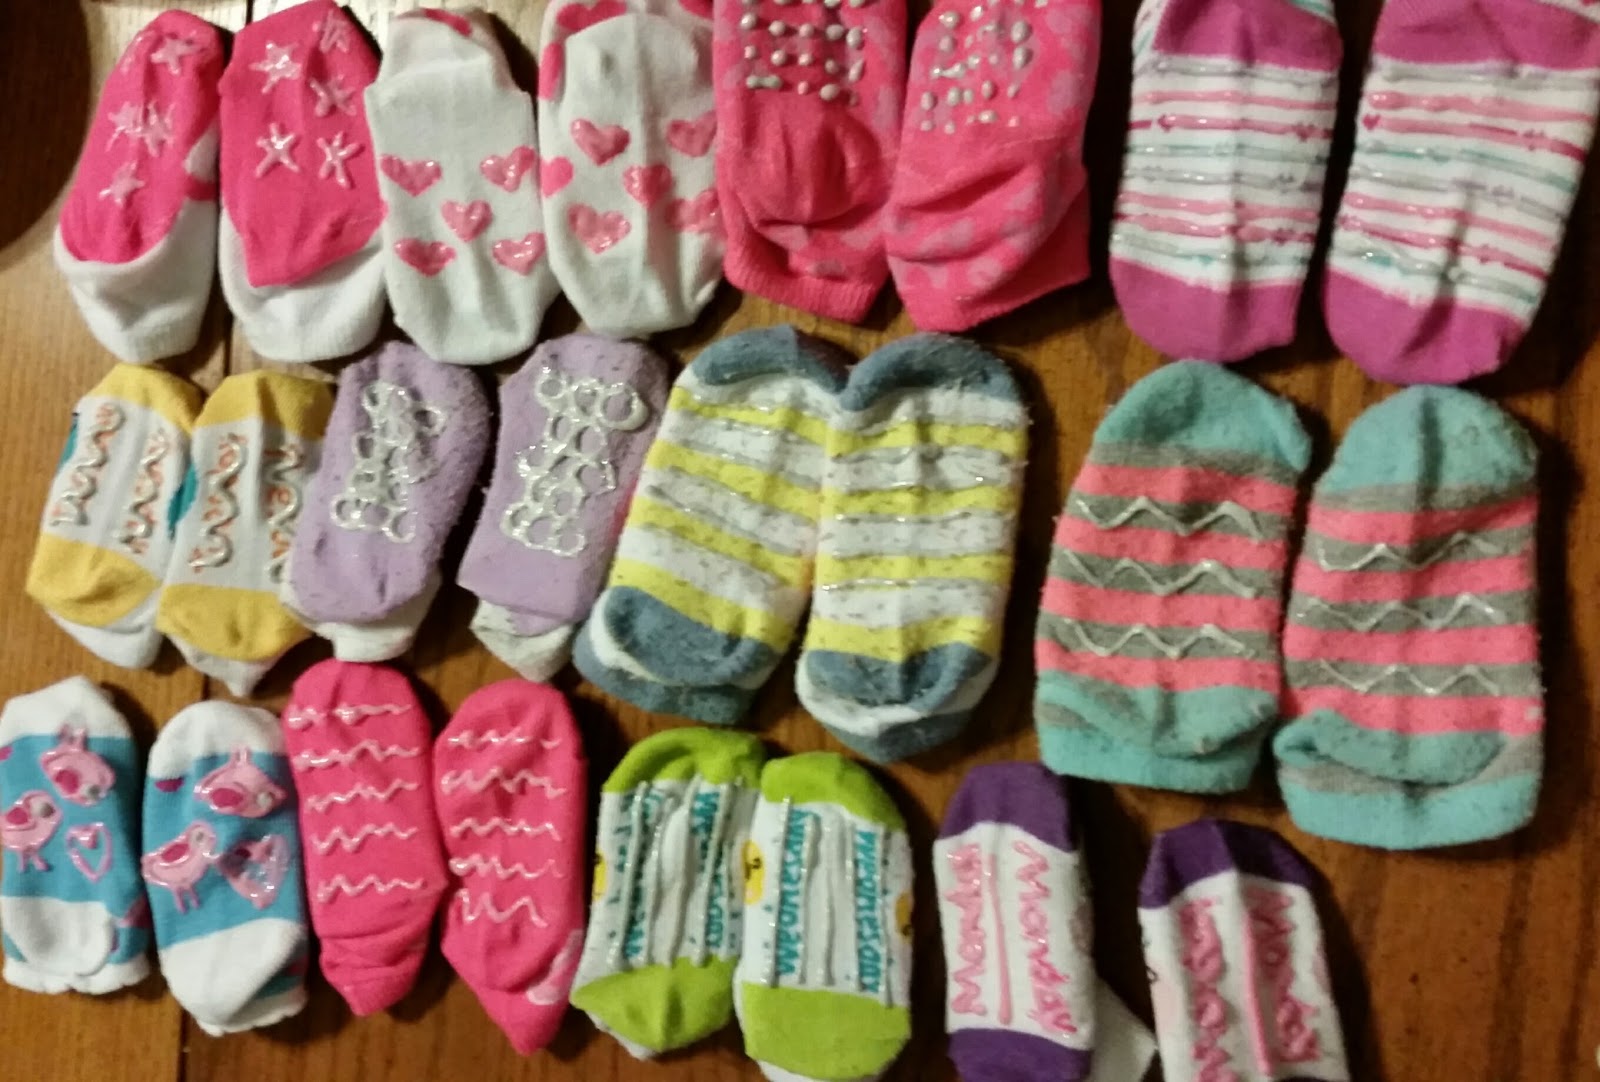
Poor Beatrix has a hard enough time crawling in pants, let alone with socks on too. She has plenty of socks, most of them second-hand, and I wanted to find a way to make them work. Enter: puff paint! A little puff paint on the bottom on her socks will make a big difference!
The paint was about $3 a bottle. I resisted the urge to buy the 10 pack and stuck with sparkly pink and silver. You will also need something to slip in the socks to keep the paint from oozing to the top of the sock - I used some cardboard that came in a box of party supplies for Bea's birthday! 
On some socks I traced the design on the sock, others I drew fun shapes or squiggles.
 Even Mr. Fish joined in on the fun!

The paint should be dry in about 4 hours but it is not safe to wash for 72 hours. (Be sure to follow the directions on the bottle of whatever brand you buy.)

I will be doing a few more batches, I think they turned out really cute!