Showing posts with label Fall. Show all posts

Tuesday, November 7, 2017

Indian Corn Toddler Craft


Any craft involving paint is always a hit with Beatrix, so this was a great Thanksgiving project for us!


We used Lego Duplos to stamp lots of little circles with red, orange, yellow, and brown paint on some white paper. 


Then we went on a walk to look for some cornstalk leaves to use as the corn husks in our project.


Once the paint was dry I cut out a corn shape from the painting. I trimmed some corn leaves and taped them down first. (You could also cut leaf shapes out of brown paper bags and crinkle them up a bit for some texture.) Then we taped the corn down on top. And there you have it! So cute to hang up and display for Thanksgiving!


Friday, November 3, 2017

Thanksgiving Sensory Bin


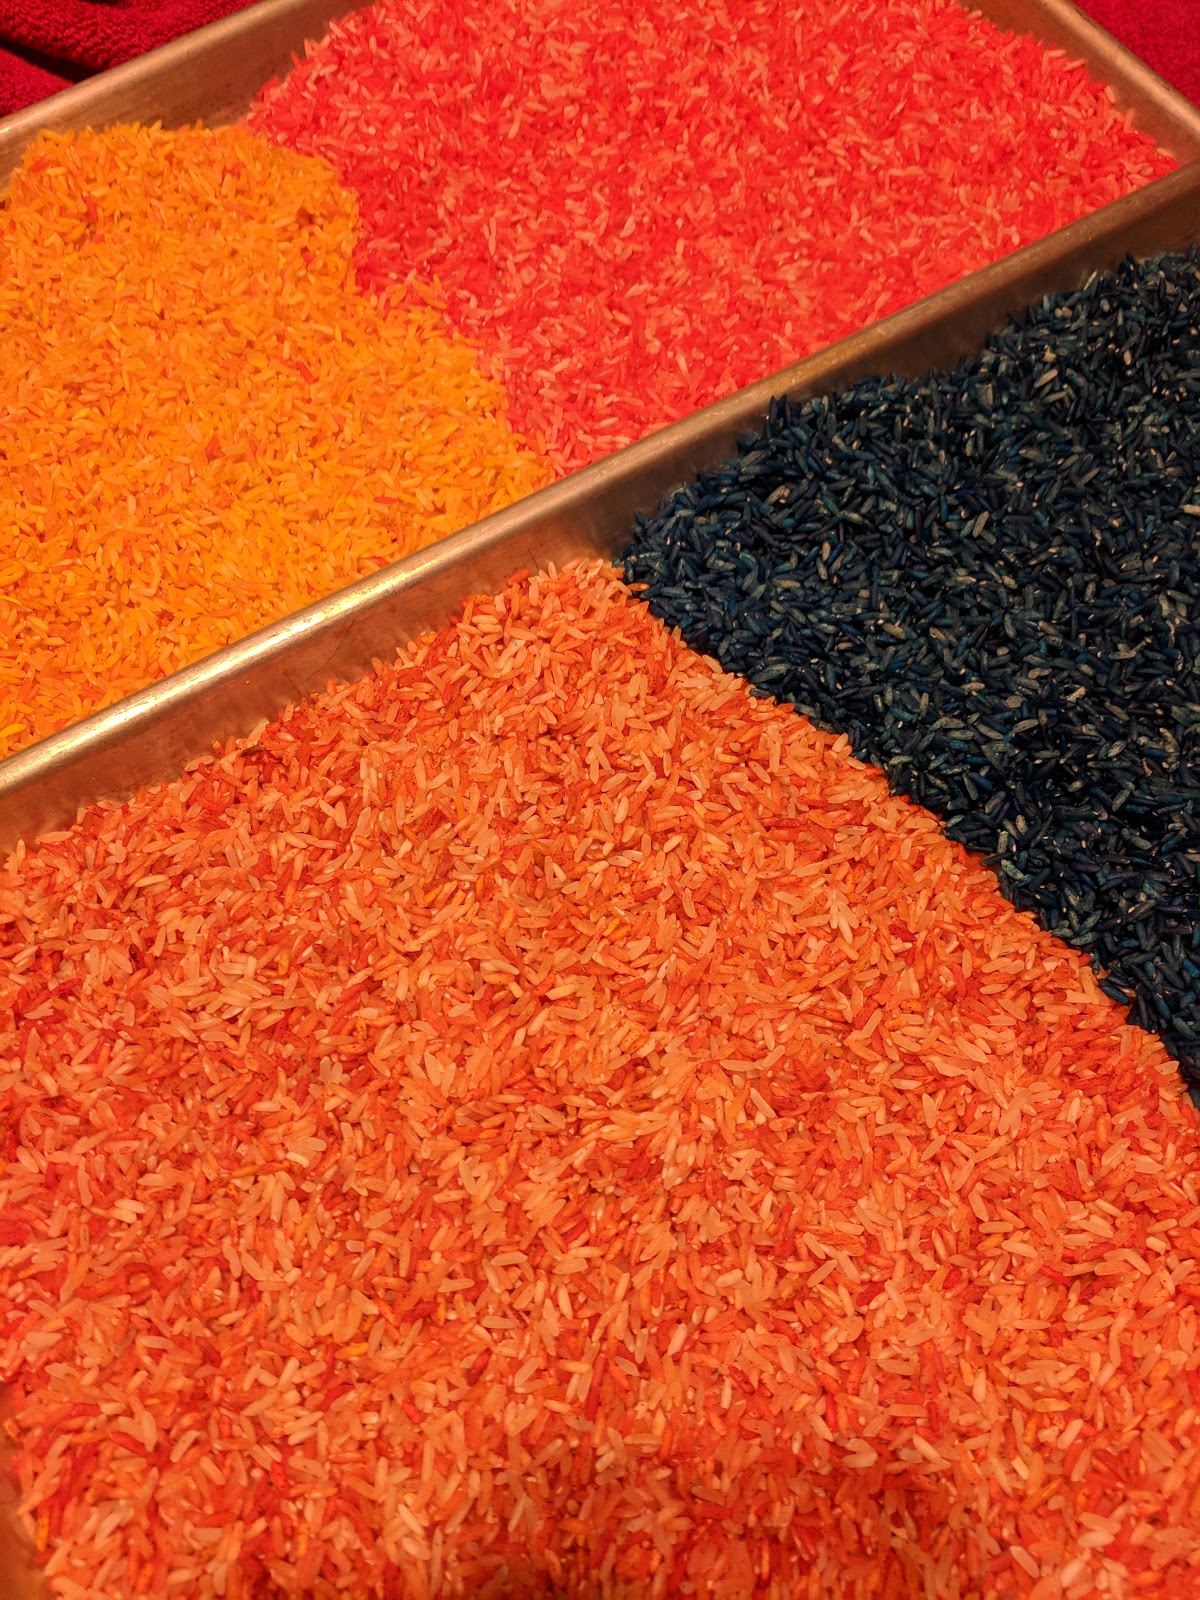
To make this colorful Thanksgiving Sensory Bin I used this method to dye my rice (except I forgot to add the water - it still worked out just fine, it just took a bit longer to mix!) I also added a few teaspoons of cinnamon and other fall spices to each bag. It smells so good! 


I filled a quart-sized bag with rice for each color. I used orange, yellow, orange mixed with yellow, and dark blue. I added some mini pumpkins, an ear of Indian corn, some feathers, and some mini pie tins. It looks so beautiful!


She has had fun scooping and pouring the rice. She likes it when I bury her hands or feet in the rice. It does make quite a mess, but we try to keep it contained to the tablecloth we use as a playmat. Then I can pour it back in!


Monday, October 23, 2017

Sticker Pumpkin Activity


Beatrix loves to play with stickers and this is a new and fun way to do just that!

All you need is a pumpkin and some stickers! We used some adorable Halloween stickers we got at a Halloween party we recently attended. Beatrix especially likes that she can peel the stickers up and reposition them over and over.


We have done this activity three or four times now. It is a great project for her to do while I am preparing a meal. She does occasionally need a little help peeling up the stickers, but if I lift the corners of a few of them at a time she is good on her own for a little while.


When she is done, it makes a cute little centerpiece for our table! (And then it is right there ready to go for when she wants to add some more stickers!)


Easy Pumpkin Craft for Toddlers and Preschoolers


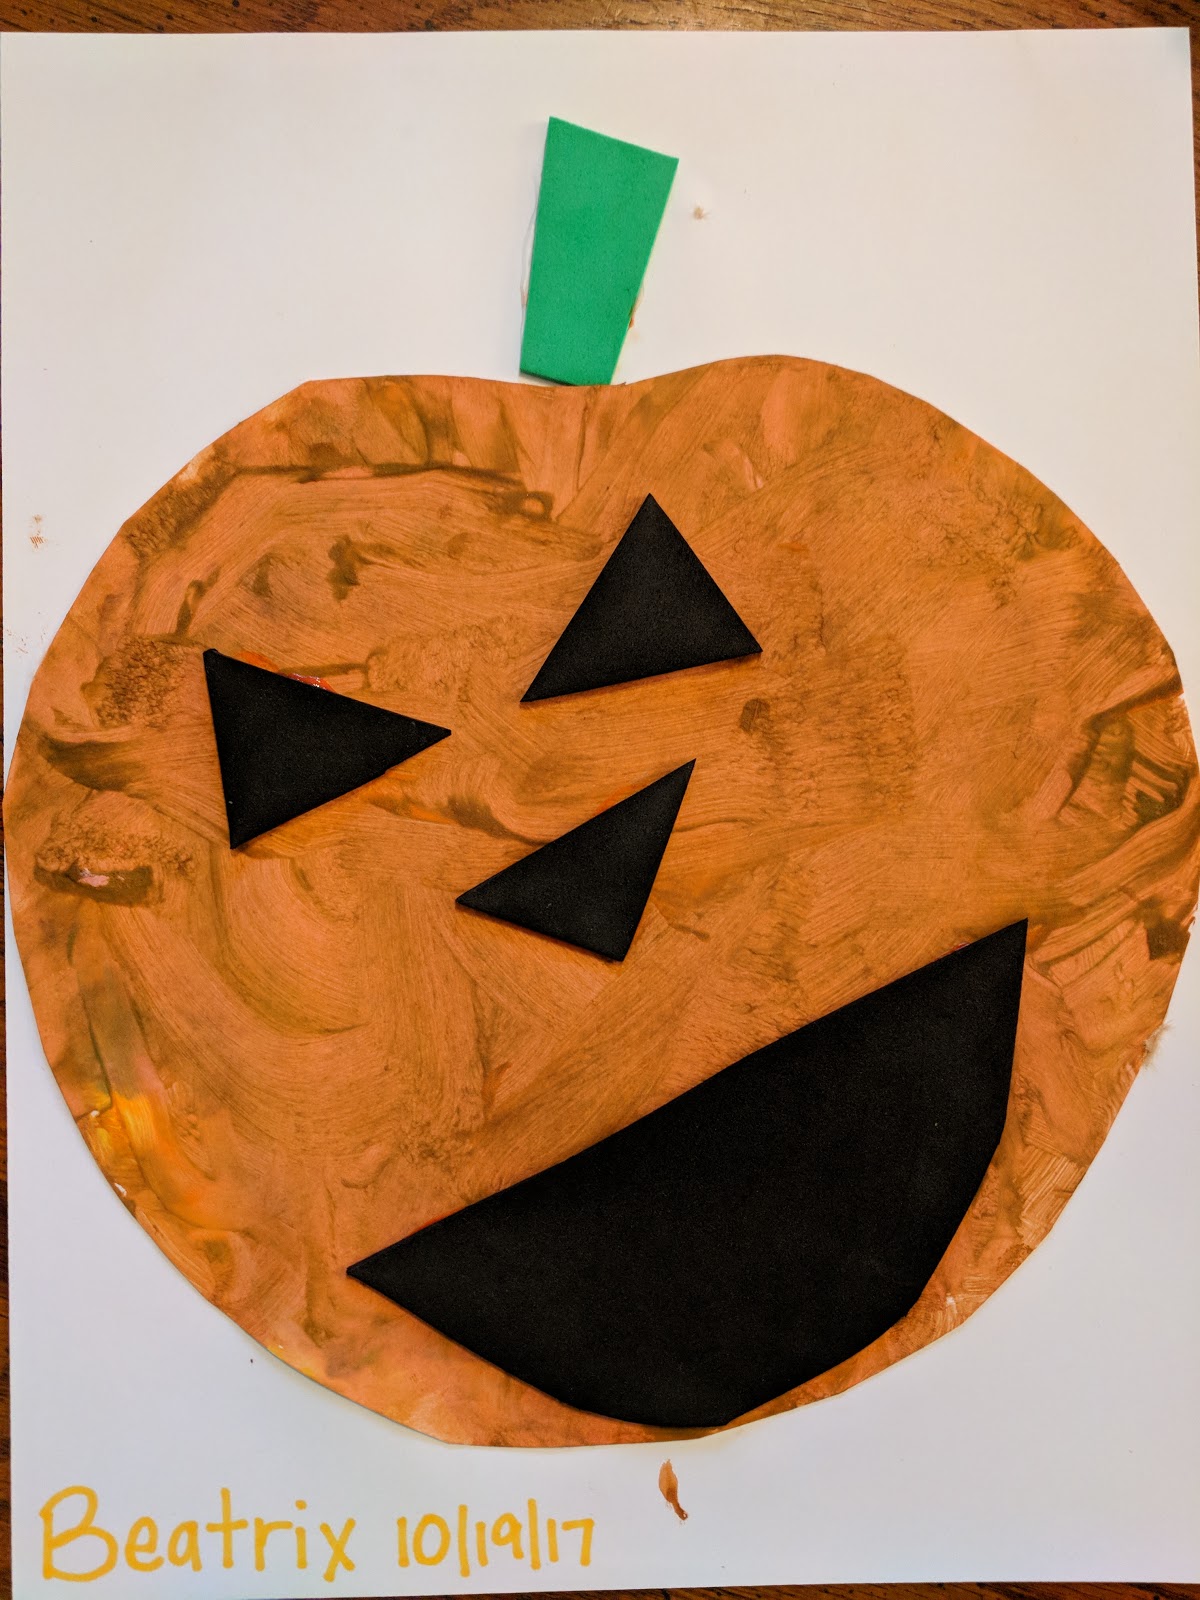
Last week Beatrix and I needed something to do. She had been asking to paint for a few days now, so I wanted to do something with paint. A little quick thinking and this is what I came up with. We both had a blast making this adorable little Jack-O-Lantern!

I cut a piece of paper into a rough pumpkin shape for her to paint. She used yellow and brown in addition to orange (she wanted more than one color.) *tip - a brown paper grocery sack makes an excellent paint mat!*


I told her to fill the whole paper with paint, leaving no white spots. She took this instruction very seriously! She got every last white space using both a brush and her hands. While she painted I cut shapes for his face and a stem out of craft foam. Construction paper would also work well. (An older child would enjoy doing this step for themselves.)


We let the pumpkin dry while we ate lunch, then it was time to give him a face! We talked about where our eyes, nose and mouth are located on our face, to give her an idea of where to put each shape. I had her arrange the face and then I glued each piece on in her chosen location with white glue. I also glued the whole pumpkin to another sheet of paper. I set the whole thing under a heavy book to dry. She was so proud to see it hanging on the wall when she woke up from her nap! 


Monday, October 9, 2017

Halloween Sensory Bin


It has been awhile since my last post, but now that the weather is starting to get cooler again, I should be updating more regularly. We spent the summer outside, learning to slide and teeter-totter, jumping in puddles and going on walks. Beatrix's gross motor skills improved by leaps and bounds this summer as she explored the great outdoors! 


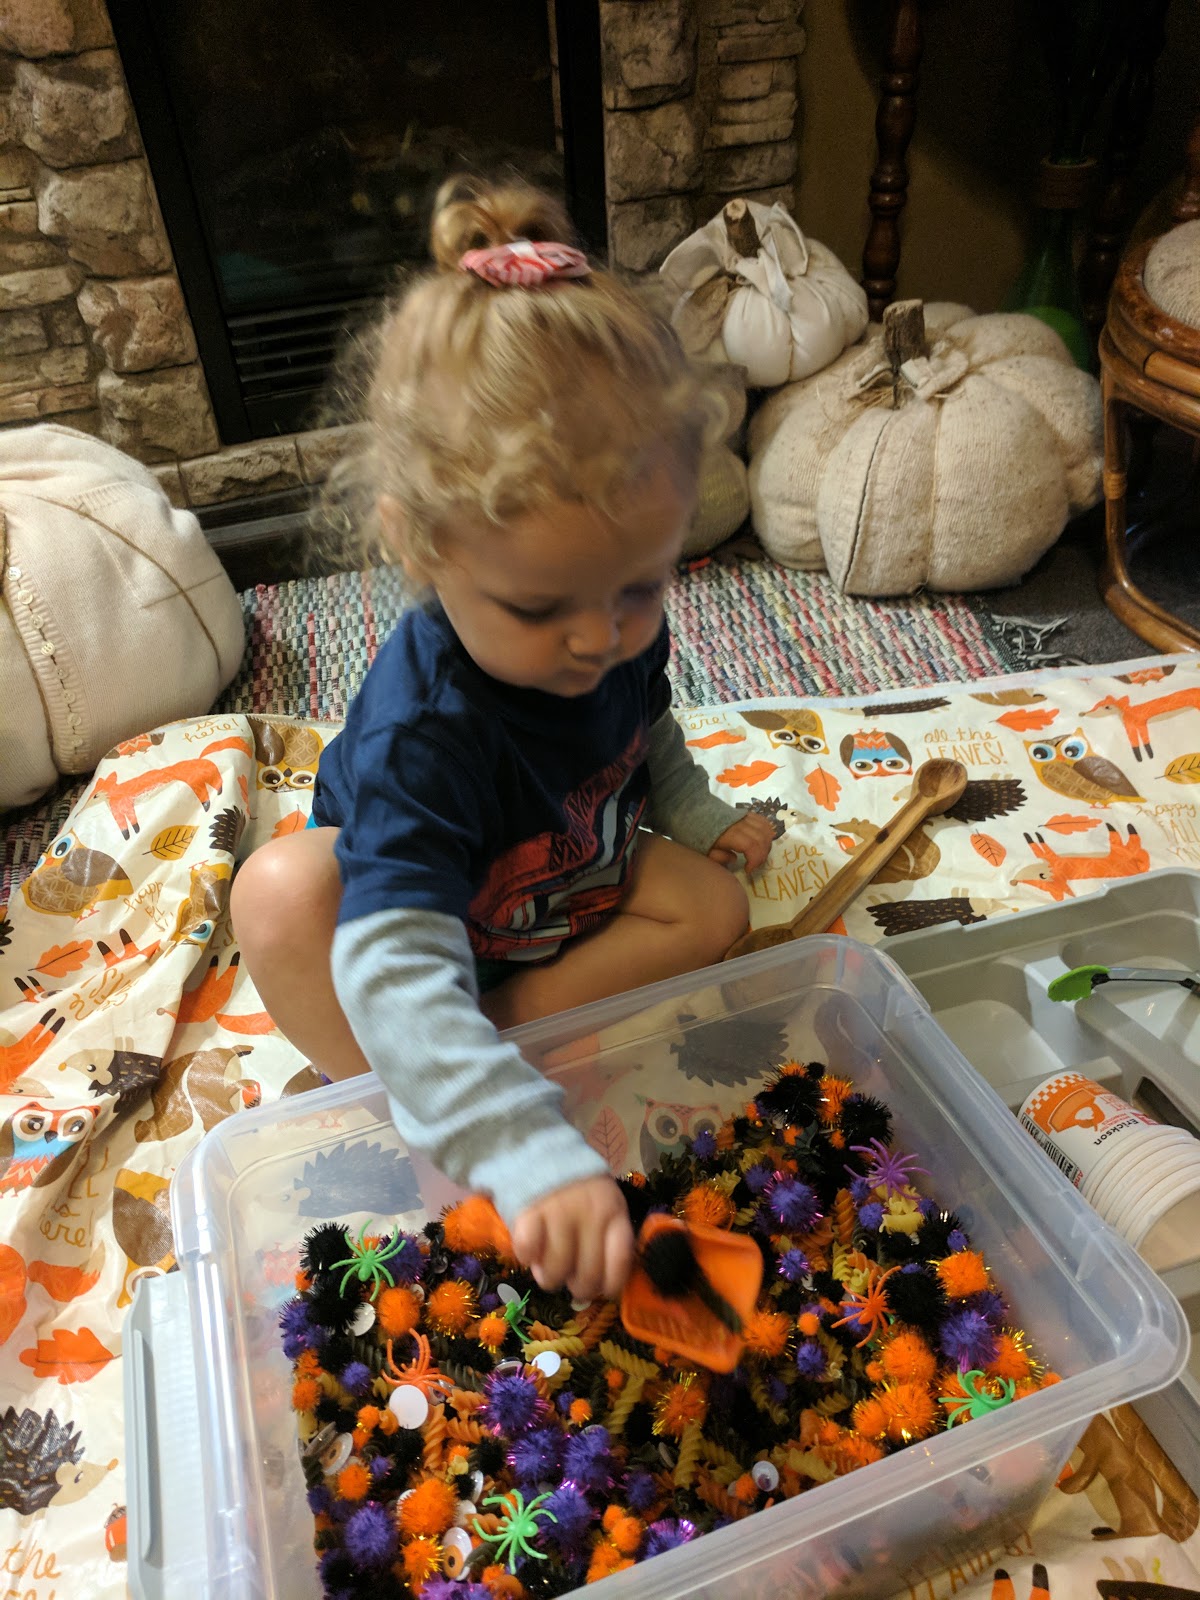
The birth of our son in December, coupled with more time indoors once winter comes, has got me planning easy (and somewhat quiet!) indoor activities to engage and occupy Beatrix. I picked up a nice tub at Walmart for about $10. to use as our sensory bin. It has a tray that fits on top that will come in handy for tools and utensils, and the lid snaps on securely. 

I put together our Halloween sensory bin with items from Dollar Tree!

  • Tri-colored dried pasta noodles
  • Pom-poms in various sizes
  • Googly eyes of various sizes and colors
  • Spider and bat rings
I dumped everything together, gathered some scooping and pouring tools, and waited for the perfect time to introduce this to Beatrix.

I laid a tablecloth out on the floor to give Beatrix a "boundary" as to where she needed to keep the little pieces and also for easy clean-up. I laid everything out while she was otherwise occupied and waited for her. Soon enough she came running over and was very interested in what she saw.


She spent time looking at each "ingredient" in the bin, and then moved on to testing each utensil. She took this as very serious work


After some time, I showed her how she could wear the rings. Beatrix enjoyed rolling the pom-poms between her hands and spent a lot of time doing this (and asking me to do the same.) We enjoyed playing and experimenting with the different materials together.


She thought it was funny to put the googly eyes over her own eyes.


Experimenting with rolling the pom-poms down her leg!


We spent a solid hour and a half playing with this sensory bin, so I'd say it was a big hit!

Thanks for reading and I hope to be back soon with some more fun ideas!


Thursday, November 24, 2016

Kitchen Treasure Basket

Sorry for the absence last week, I was crazy busy getting ready for Beatrix's birthday and party. It is so hard to believe I have a one year old!

I put together this treasure basket right after Halloween, but I never got around to posting it. I thought a kitchen basket would be an appropriate nod to Thanksgiving


Whats in it:

  • Assorted containers to stack
  • Assorted kitchen utensils
  • Some crumpled up aluminum foil for something new to explore
That is really about it. I added some things here and there, and took some things out (because I was tired of yogurt lids everywhere, and I needed the spatula) 

She didn't show as much curiosity about this basket as others. I am guessing that is because she has played with almost all of these objects before. But it still kept her busy!

This would be a great way to keep your kiddos entertained while cooking Thanksgiving dinner. Just throw some assorted kitchen items into a big pot and let them have at it while staying out of your hair (and the hot oven!)

Happy Thanksgiving! 

Tuesday, October 25, 2016

Beatrix's Bum-kin

Handprint crafts and babies don't mix very well. When they are really little they don't want to open up their hand but when they are bigger they won't hold still. So what to do to commemorate baby's first Halloween?

The bum-kin!
That's right. A bum print, decorated to look like a pumpkin! 

I don't have pictures of the process, because as you can imagine, it took all the spare hands available! We stripped her down naked in the bathroom and Mr. Fish and I wore old clothes that could get paint on them. I quickly coated her cheeks in pumpkin orange paint (I used acrylic because it was what I had. If you were worried about toxins or things like that, you could use fingerpaint.) After painting her bum, I plopped her onto a canvass that I had sitting on the toilet lid and then into the bath she went! She tolerated the whole process without a fuss. WhIle Mr. Fish washed her up I added a few finishing touches. 

I look forward to the look on her face when she is a teenager and I am still proudly displaying her bum-kin for all her friends to see! (Tee hee!)

Wednesday, October 12, 2016

Fall Sensory Squish Bag

Squish bags are cheap, easy to make, and all sorts of fun. They can be filled with a variety of materials - the possibilities are endless! Here's how I made this one!

All you need to make your very own Fall Squish Bag is:

  • A sturdy quart or gallon-sized zippy bag (I used a gallon this time, but I have done quarts in the past.)
  • Some kind of clear gel for filling (I used dollar store hair gel, you can also use shower gel/body wash, or hand soap.)
  • Fake fall leaves (the first fall bag I did I used real leaves, but the leaves turned the gel an icky brown.)
  • Small beads
  • Glitter!
  • Duct tape to seal the zipper edge
Just dump the "dry ingredients" - the beads, leaves, and glitter - in the bag and scoop or squeeze in the clear gel of choice. LESS IS MORE - that goes for the little items as well as the gel. Too much and it is harder to interact with. Tape off the zipper side and all around if you like. I tape ours to the window and Beatrix sits on the couch and plays with it. It is pretty with the sun shining through!


Happy squishing!


Tuesday, October 4, 2016

Treasure Baskets

Treasure baskets are one of my favorite little activities to put together for Beatrix.

A treasure basket is essentially a collection of varied baby-safe non-toy objects for baby to explore. The items you choose should contrast with each other in some way and captivate different senses. I try to include different textures and weights. Something smooth, something rough, something that makes noise, something soft or squishy. Something with a good smell.  The items should be placed in a shallow basket so they are easy to see and grab. I like to plan my baskets with themes, although a random assortment would be just as fun! We switch it up every few weeks, to change with the seasons or as Beatrix starts getting bored. Mr. Fish is particularly good at coming up with ideas for the baskets.

In my house, the treasure basket sits out all the time, in an area slightly away from her toys. It could also be something you saved for times when your little ones are needing something different to do.

With the treasure basket, I try to make it more independent play, letting her discover each item on her own terms and deciding for herself what to do with it.

This is our current treasure basket that I have been calling "Autumn Treasures"

A list of what is in this basket:

  • Assorted gourds - some bumpy and some smooth -
  • Fake fall leaves
  • a nutmeg in an old ground nutmeg container (good for shaking)
  • a small amount of cinnamon in a spice jar (I covered with a scrap of cloth to try and keep the powder inside)
  • Candy corn in a jar (pretty to look at)
  • A pair of fuzzy socks
  • A ghost cookie cutter - growing up we would always make Halloween cookies with my grandma, a tradition I intend to pass down.
Since this picture was taken I have added some burlap and fall-patterned fabric scraps from her Halloween costume - I will post about that later!

There are no real rules involved with making a treasure basket and you can use everyday items from around the house - so it doesn't even have to cost a cent. 

If you were inspired to make a treasure basket I would love to see what you did! I am always looking for inspiration!